
Paraplegic Ice Hockey Sled
How do you reinvent the ice hockey sled for paraplegic players to enhance its safety, comfort, and performance, while also allowing it to fit a range of bodies?
Project Overview
Problem:
Ice hockey sleds for paraplegic and amputee players have an outdated design that doesn’t meet the needs of the players. They do not offer sufficient padding to support players who still have their legs; they are bulky, preventing the players from making quick and agile movements, and they are very challenging to adjust.
Solution:
As part of an internal effort at Eleven, I spearheaded the re-engineering of a paraplegic ice hockey sled. Over the course of six months, I worked with an Industrial Designer, an Engineering Intern, our CEO, and local paraplegic ice hockey players to create an adjustable, athletic, and comfortable new sled.
Eleven's video of the sled project
Design Process

State of The Art Research
To initiate the effort, we investigated the state of the art products and gained user feedback on their functionality and appeal. We learned that the current models are all designed to be occupied with straight legs, which is uncomfortable and bulky for players with legs. Additionally, the sleds lack padding and the blades and leg length components are challenging to adjust.

State of the Art Product Adjustment
As you can see, adjustment of the sled required multiple tools and significant time and manual labor. The inconvenient and difficult nature of this process was a key user criticism of the state of the art sleds.
User Research
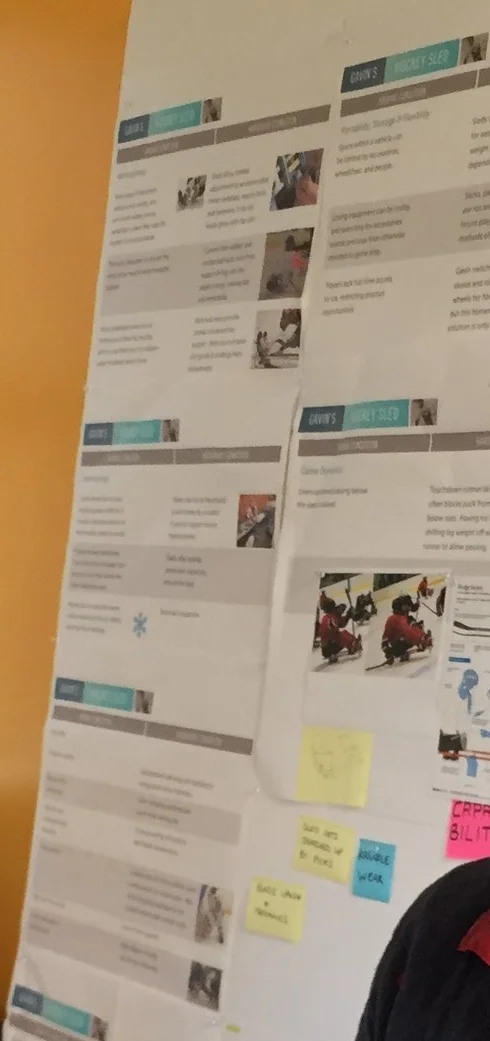
We brought in several paraplegic ice hockey players and a local sled hockey coach to help us understand the needs and concerns of players.
"Looks-Like" Prototype
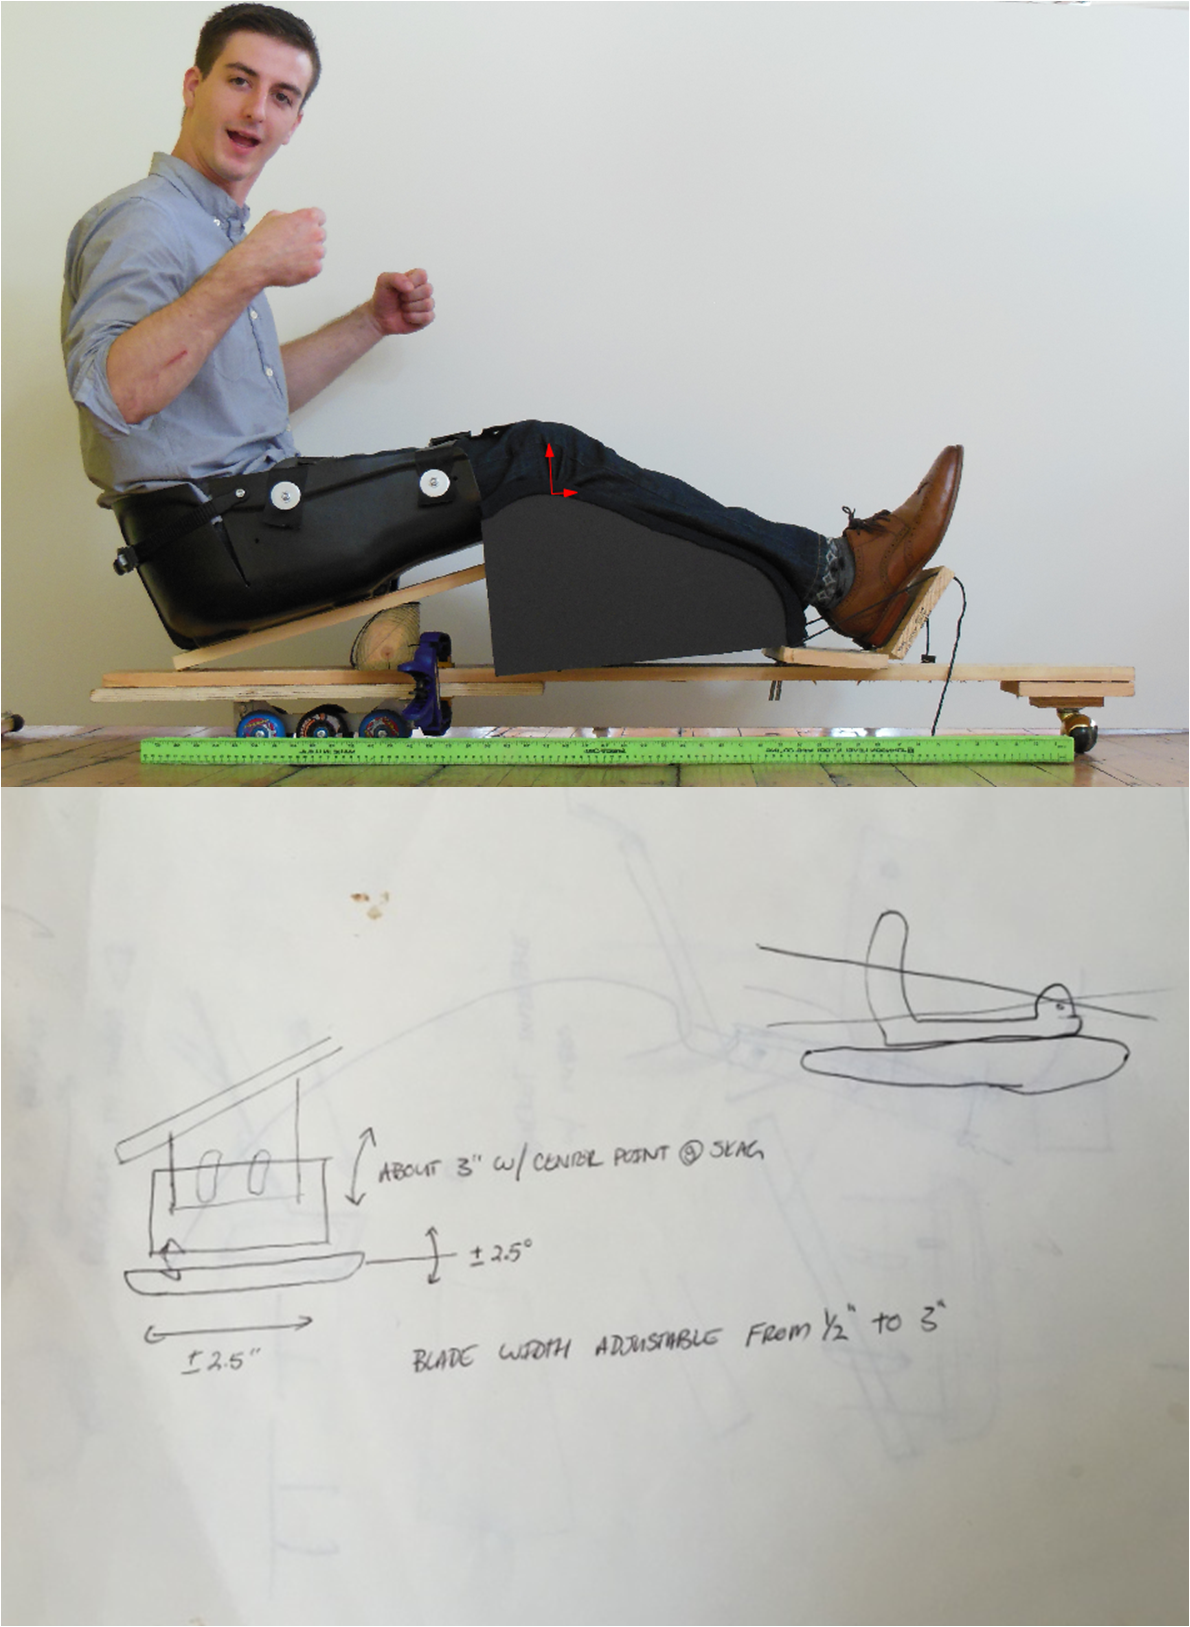
Before jumping into computer aided design, we built a "looks-like" prototype that allowed us to figure out the correct angles for the sled. The simple prototype was built out of wood and had a door hinge that allowed the angles of the seat and the legs to be adjusted. I later used photographs of this rough prototype to help me design the model in SolidWorks.
At this stage, we also required the constraints for how the sled was to be adjusted. We determined the desirable adjustment windows for the height, length, and angle of the sled, and built in additional adjustments to allow for the necessary degree of flexibility.
Blade Adjustment Mechanism
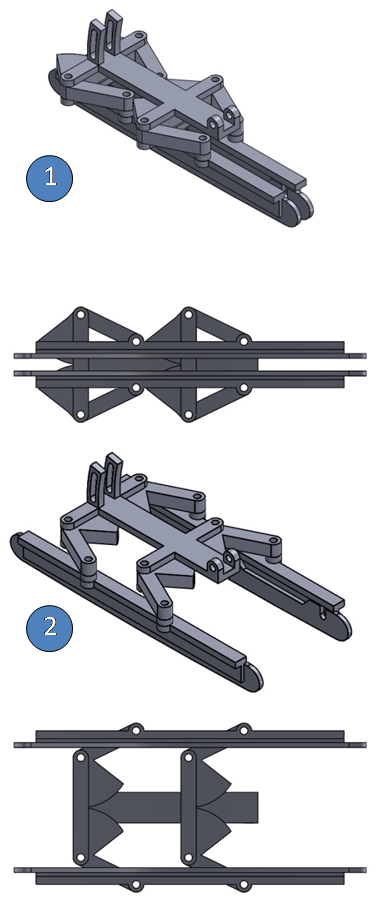
One component of the sled that required flexibility and easy adjustment was the blade width. I designed and modeled a mechanism to allow for easy adjustment, as shown here:
1. Closed Blades: The blades are half an inch apart when closed.
2. Open Blades: the blades can expand to be 4 inches apart in the open position.
Despite the high functionality and ease of use of this design, we learned through user interaction that the material protruding from the sides of the blades in the closed position would inhibit "carving" of the ice while turning.
Blade Adjustment Mechanism: Second Iteration
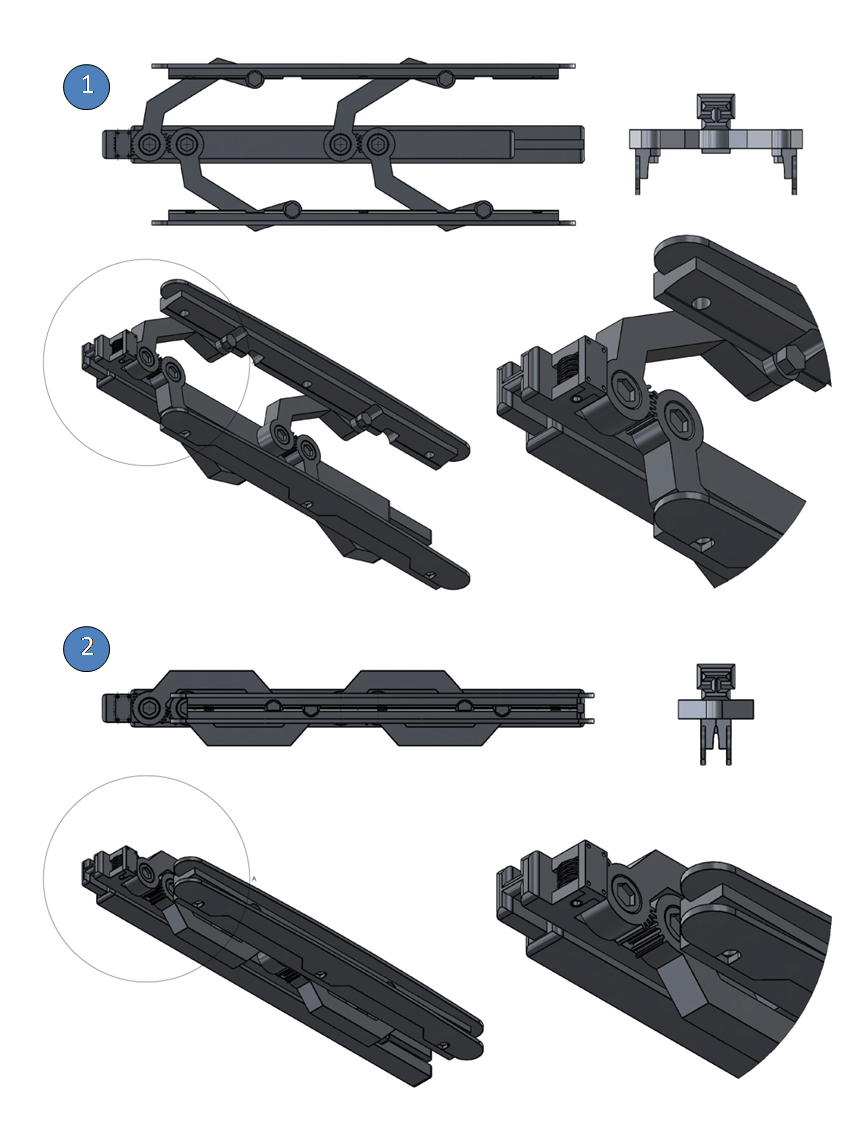
To eliminate the excess material on the outside of the blades in closed position, I created a new blade adjustment mechanism:
1. Open Position: The blades can expand to 4 inches wide, which is ideal for a beginner.
2. Closed Position: The blades can collapse to be half an inch apart for more advanced players. The reduction in material outside the blades allows the user to tilt the sled when turning.
The system is controlled via a worm gear that can be adjusted via an Allen key. The blade width would be infinitely adjustable, instead of requiring addition or subtraction of blade spacers that exist in state of the art sleds. Though this new design was attractive to the user, we decided not to move forward with it because of its mechanical complexity.
Seat Length Adjustment
The next component of the sled design that we tackled was the seat length. Different players require different seat lengths to accommodate their legs, but adjusting this length is time consuming particularly when multiple players use the same sled in rotation. We sought to create a simple, easy to use mechanism to solve this problem.
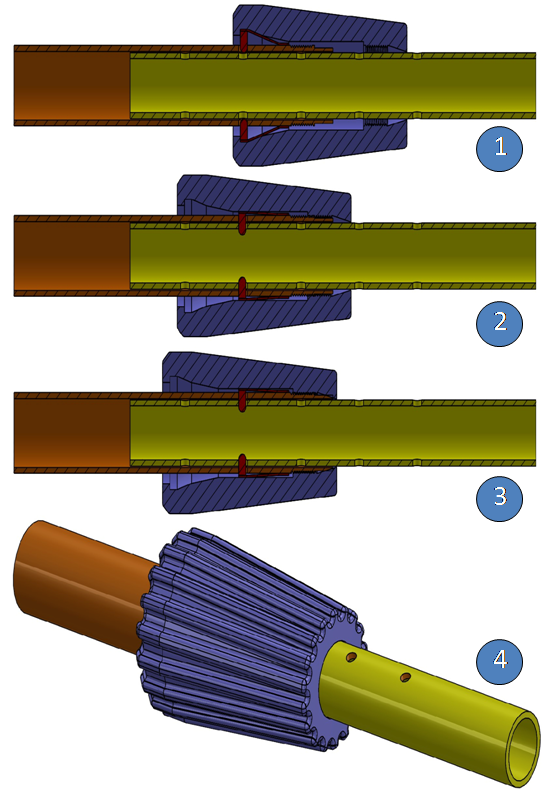
I created a tool-less telescoping mechanism that offers a secure fit between the tubes as compared to a cotter pin approach, and allows for rapid adjustment.
1. Open: The yellow tube can slide freely into the orange tube, however the red spring loaded prongs still click over each hole giving haptic feedback to the user when they hit an increment.
2. Semi-Closed: The blue twist cover slides toward the orange tube once the desired length has been found. This motion pushes the red prongs into the slot in the tubes, locking them in position. At this point, the blue cover's threads begin to mesh with the threads on the outside of the orange tube.
3. Closed: Once the user has fully twisted the blue cover onto the orange tube, the cover wedges the orange tube into the yellow tube creating a friction fit similar to how a tool collet works, ensuring a snug "rack-free" fit between the tubes.
4. Isometric view of the mechanism: The ribs on the outside of the cover allow the user to grip it while turning it, eliminating the need for tools.
Telescoping Mechanism FEA Analysis
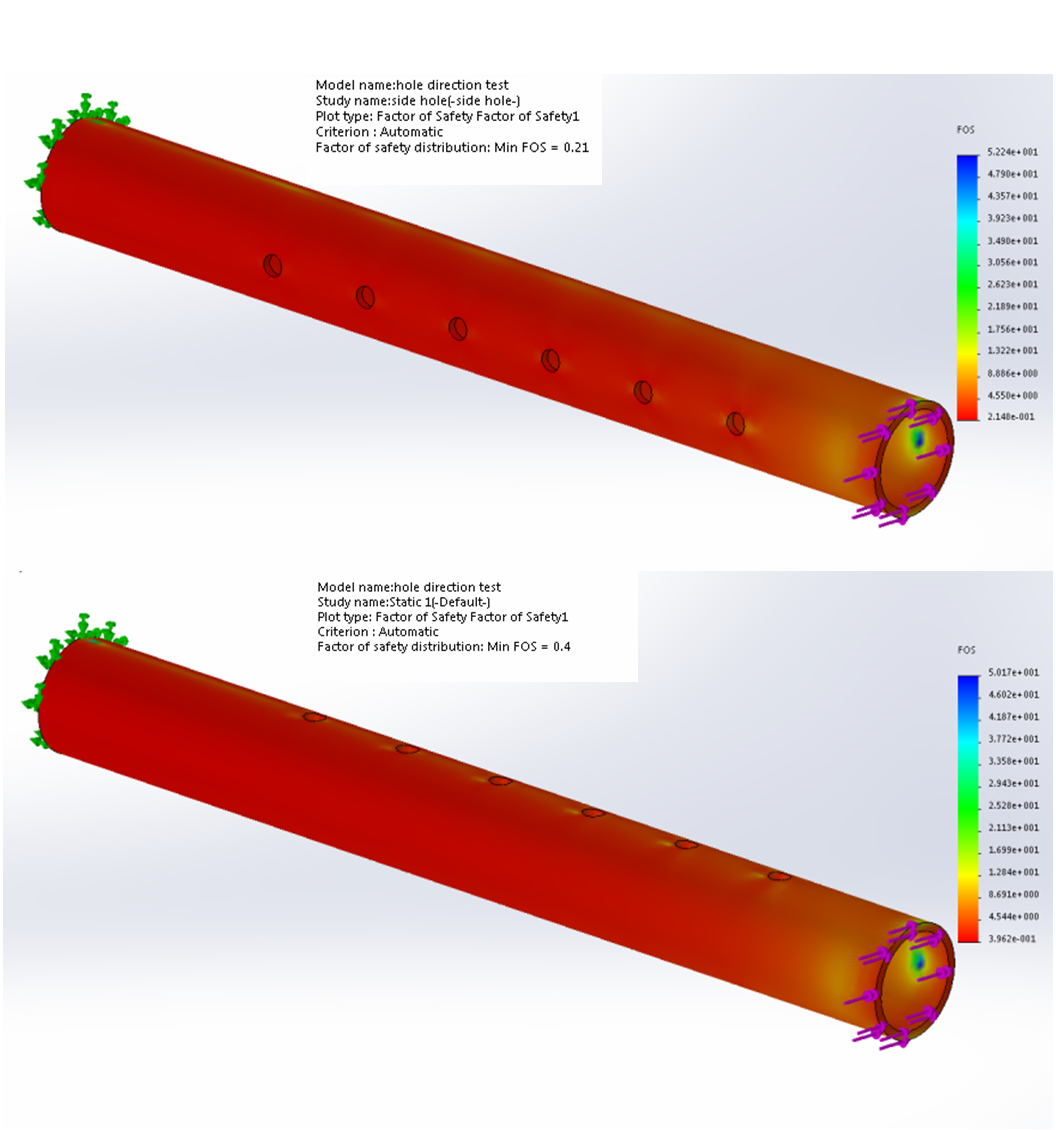
To determine whether to orient the holes on the telescoping seat poles horizontally (top) or vertically (bottom), I ran a simulation comparing the factor of safety for each option. As I expected, the factor of safety was twice as high for the vertical orientation, when the load was perpendicular to the axis of the holes. We designed the orientation of the holes according to this simulation to reduce the potential for failure of the tubes, due to a head on collision.
Bumper Design Process
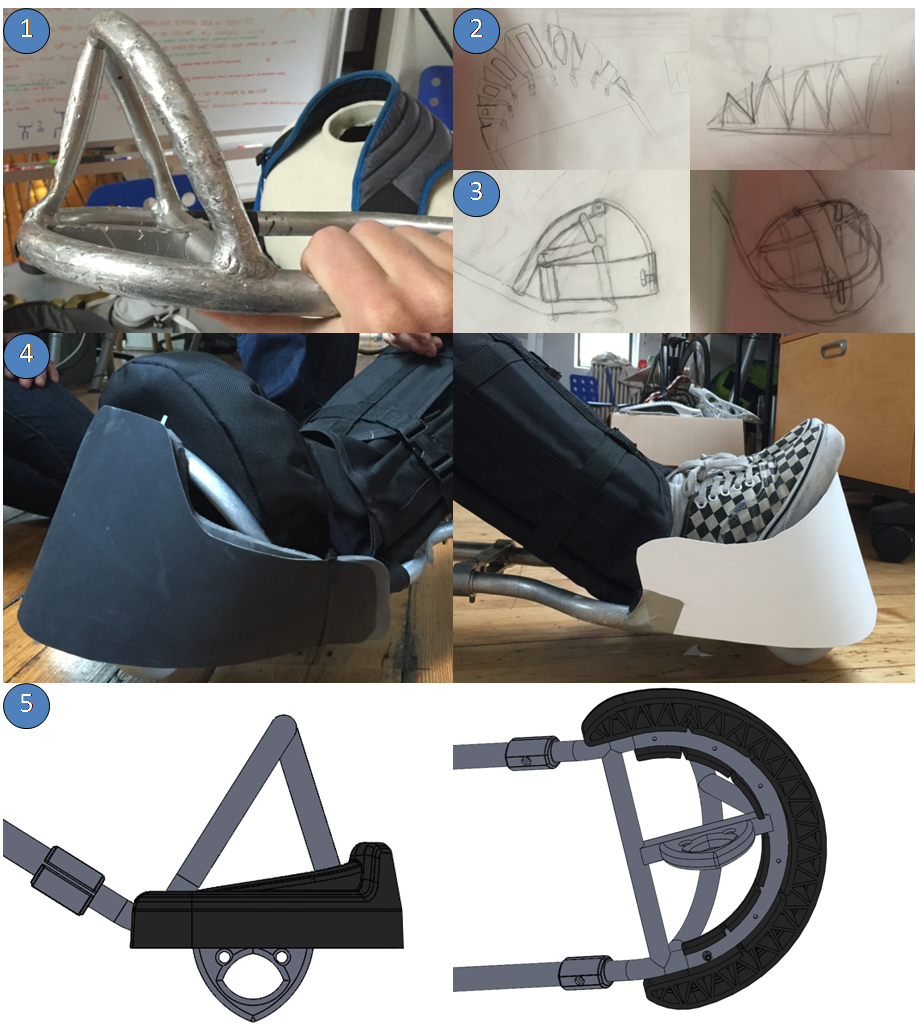
The last big component of the sled to redesign was the very front of the sled. One of our users brought us his front nose tube from his sled, and from the dents and scratches it was apparent that head-on collisions are frequent in the game and the shock is not well-absorbed. To reduce the impact of collisions, we designed a bumper for the front of the sled:
1. Our user's sled's front nose tube.
2. Sketches of a "tweel" bumper that has crush zones to absorb the impact
3. Sketches of a spring steel bumper that would slide and bend on impact to absorb crashes.
4. Physical mock ups to get a sense of size and design.
5. My CAD models showing the tweel bumper design. It would be injection molded and is fully drafted and manufacturable.
Physical Mock Ups
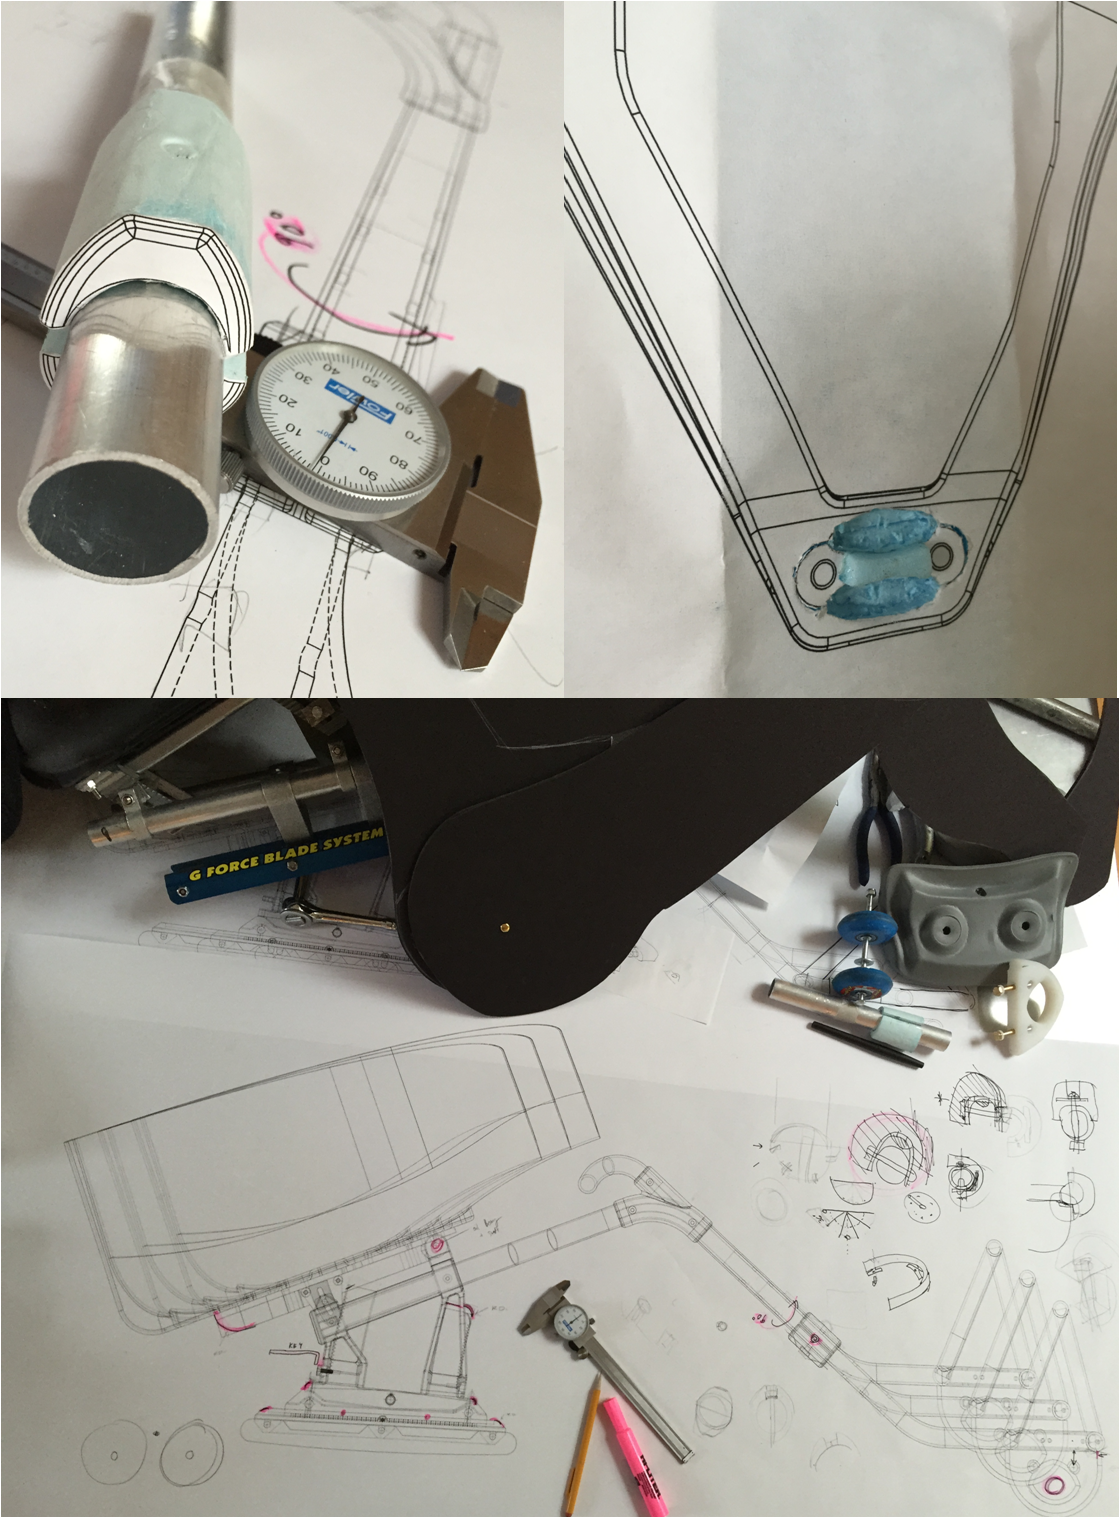
As we started to finalize the CAD designs, I decided to print out full scale sketches of the sled to put the size of the product in perspective and confirm the dimensions.
1. Clamp: I printed out the side clamp that facilitates the telescoping of the front half of the sled. I wanted to confirm that it didn't stick out too much, and wouldn't be a potential catch point.
2. Height Adjustment: I also printed out a sketch of the mechanism that lifts the sled up from the blades, to confirm that the user would feasibly be able to use the feature. This was an important check as it was a very tight fit to get your fingers around the pull tab. I later redesigned it to make it easier to use.
3. Final Check: Before sending the designs off for prototyping quotes, we printed out the whole assembly and checked it against our physical prototype to ensure we had all the measurements correct. This step also allowed us to red-line any areas of concern.
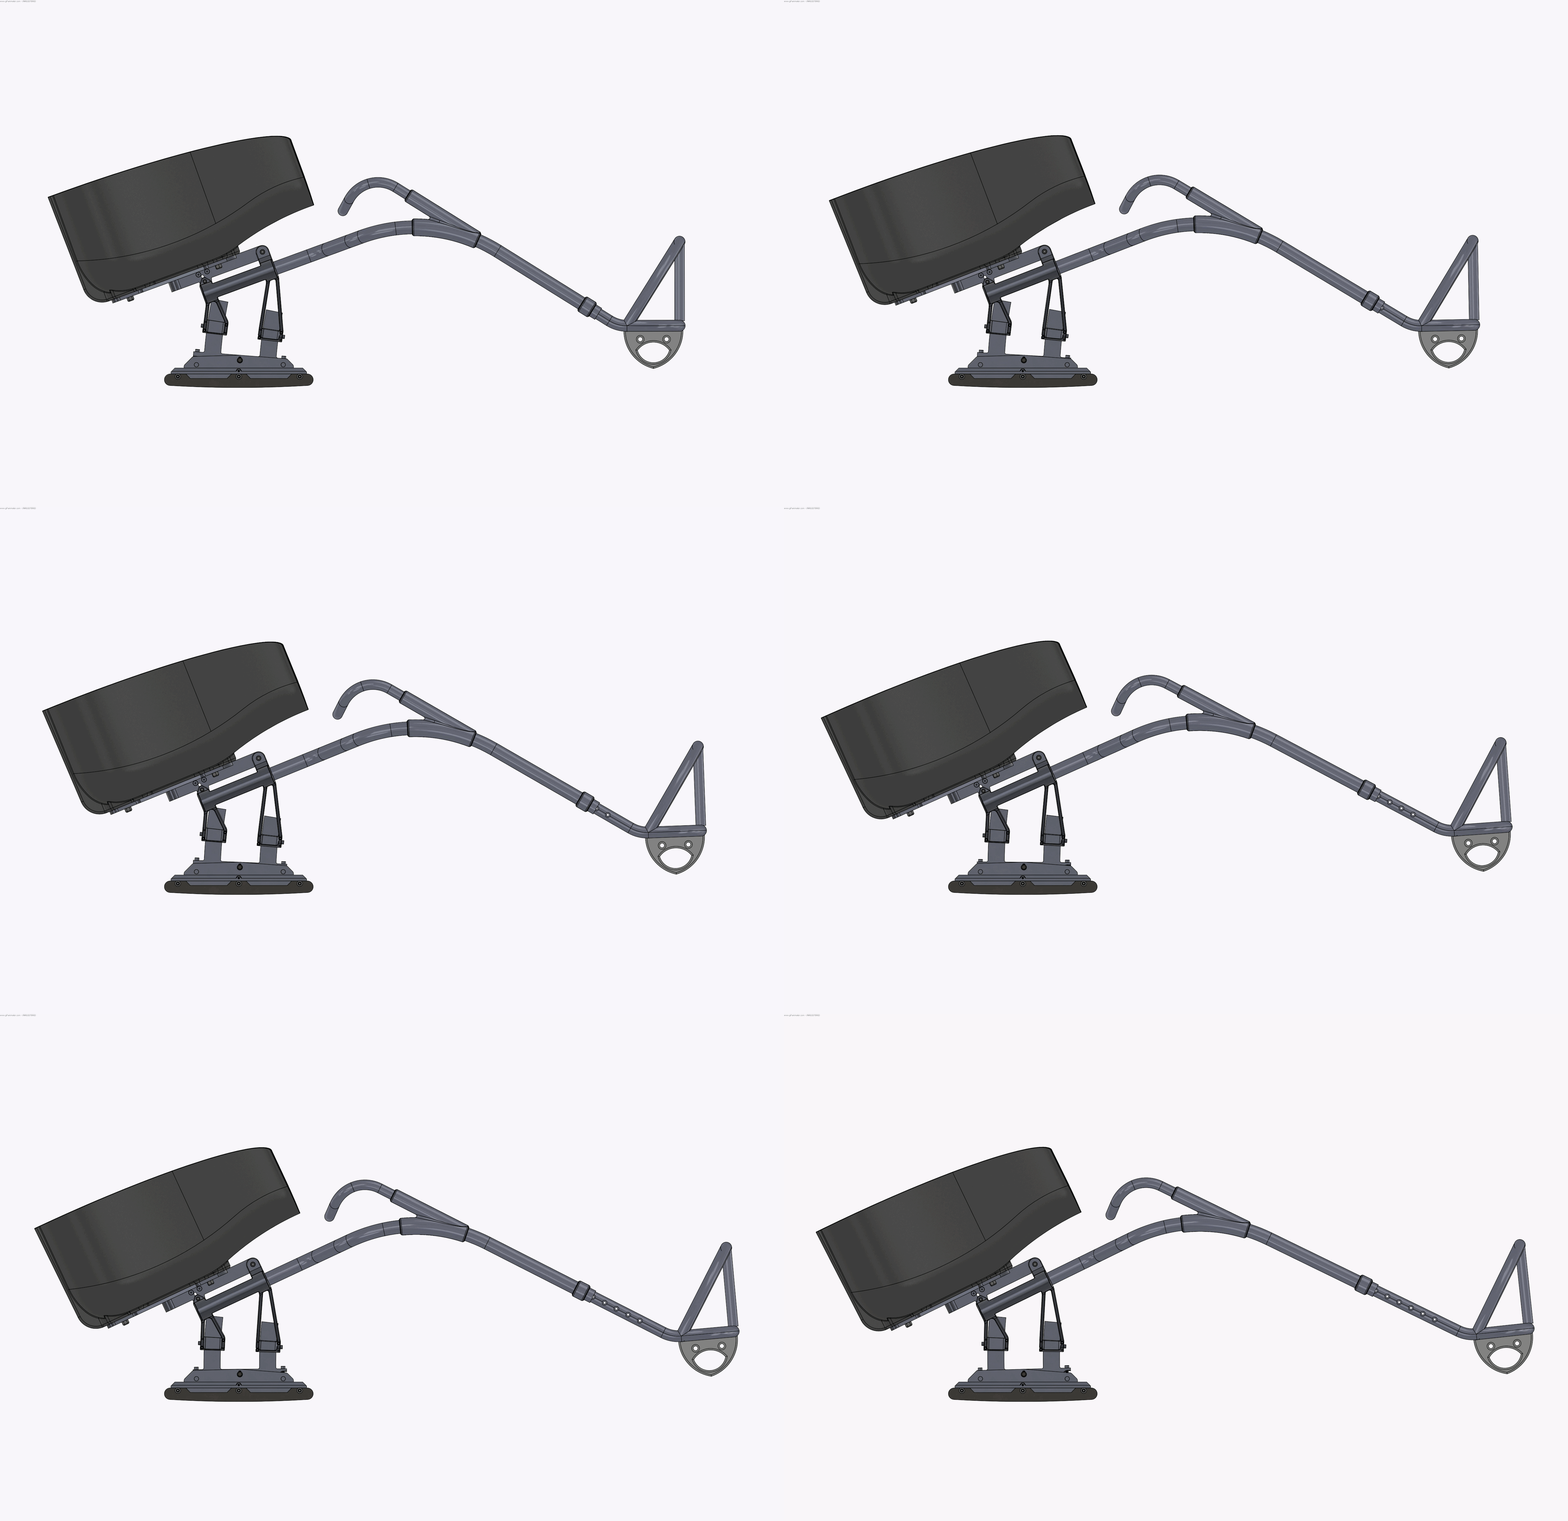
Size Adjustment
The plastic "skeg" at the front of the sled prevents the player from nose diving, but ideally it stays off the ice during game play. The Sled's adjustment mechanisms allow the skeg to maintain a constant height above the ice while the sled telescopes to fit different size players.
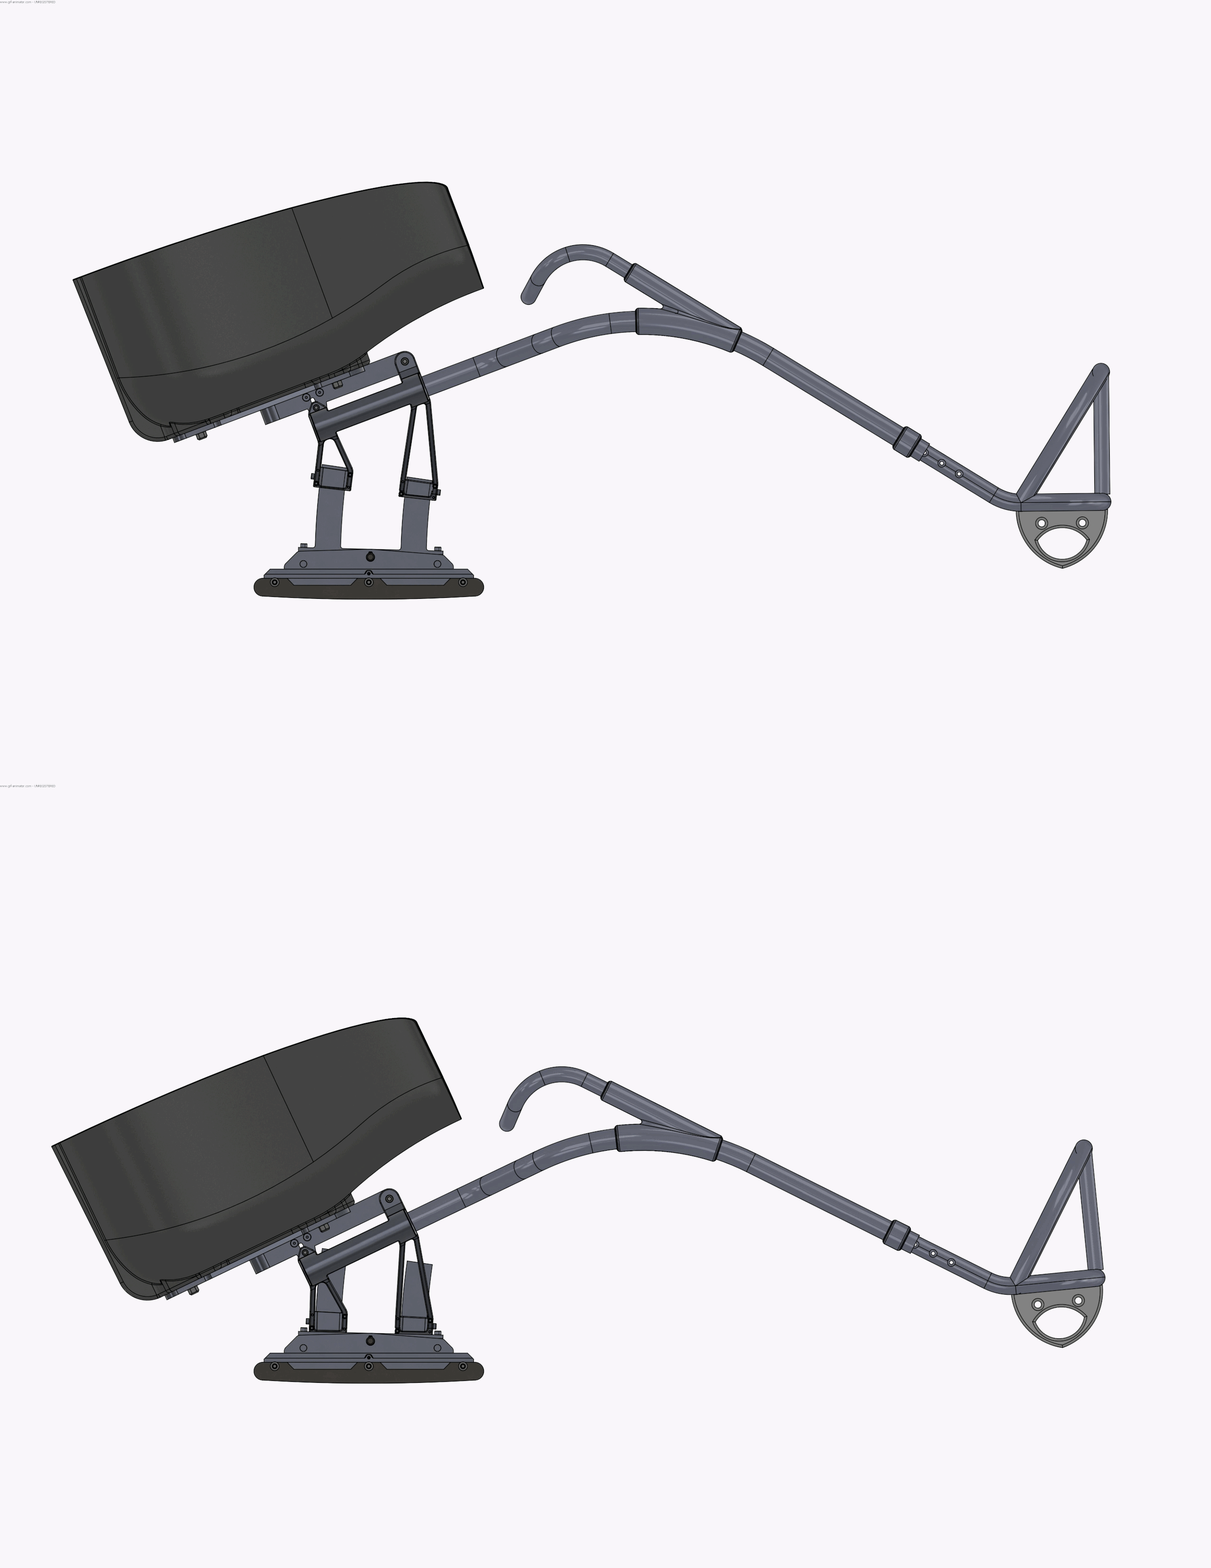
Sled Height Adjustment
The entire Sled can raise up off the ice 5 inches to allow the player to adjust how aggressive their angle of attack is. The height mechanism is on an arc so that raising the height of the sled doesn't effect the Skeg's height off the ice.
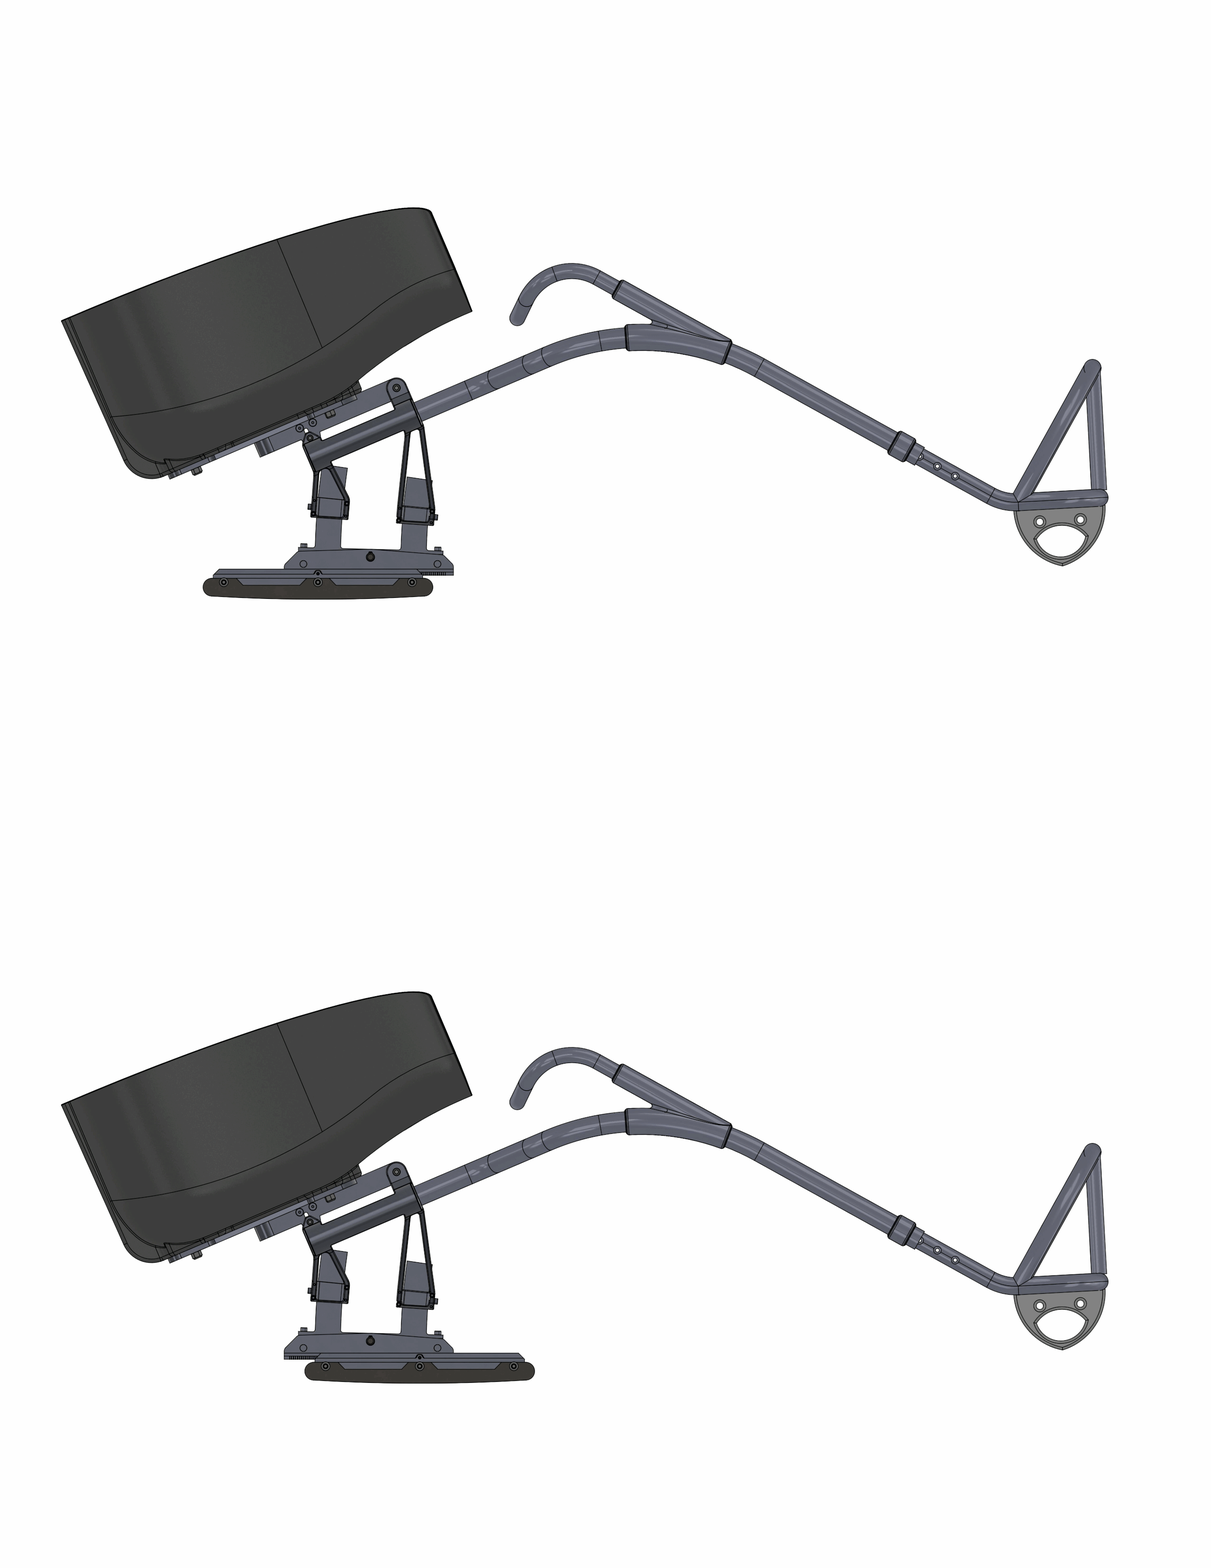
Blade Position Adjustment
The blades are able to shift 2.5 inches forward and backward from a nominal position to accommodate different size players. This adjustment allows the player to fine tune their center of gravity.
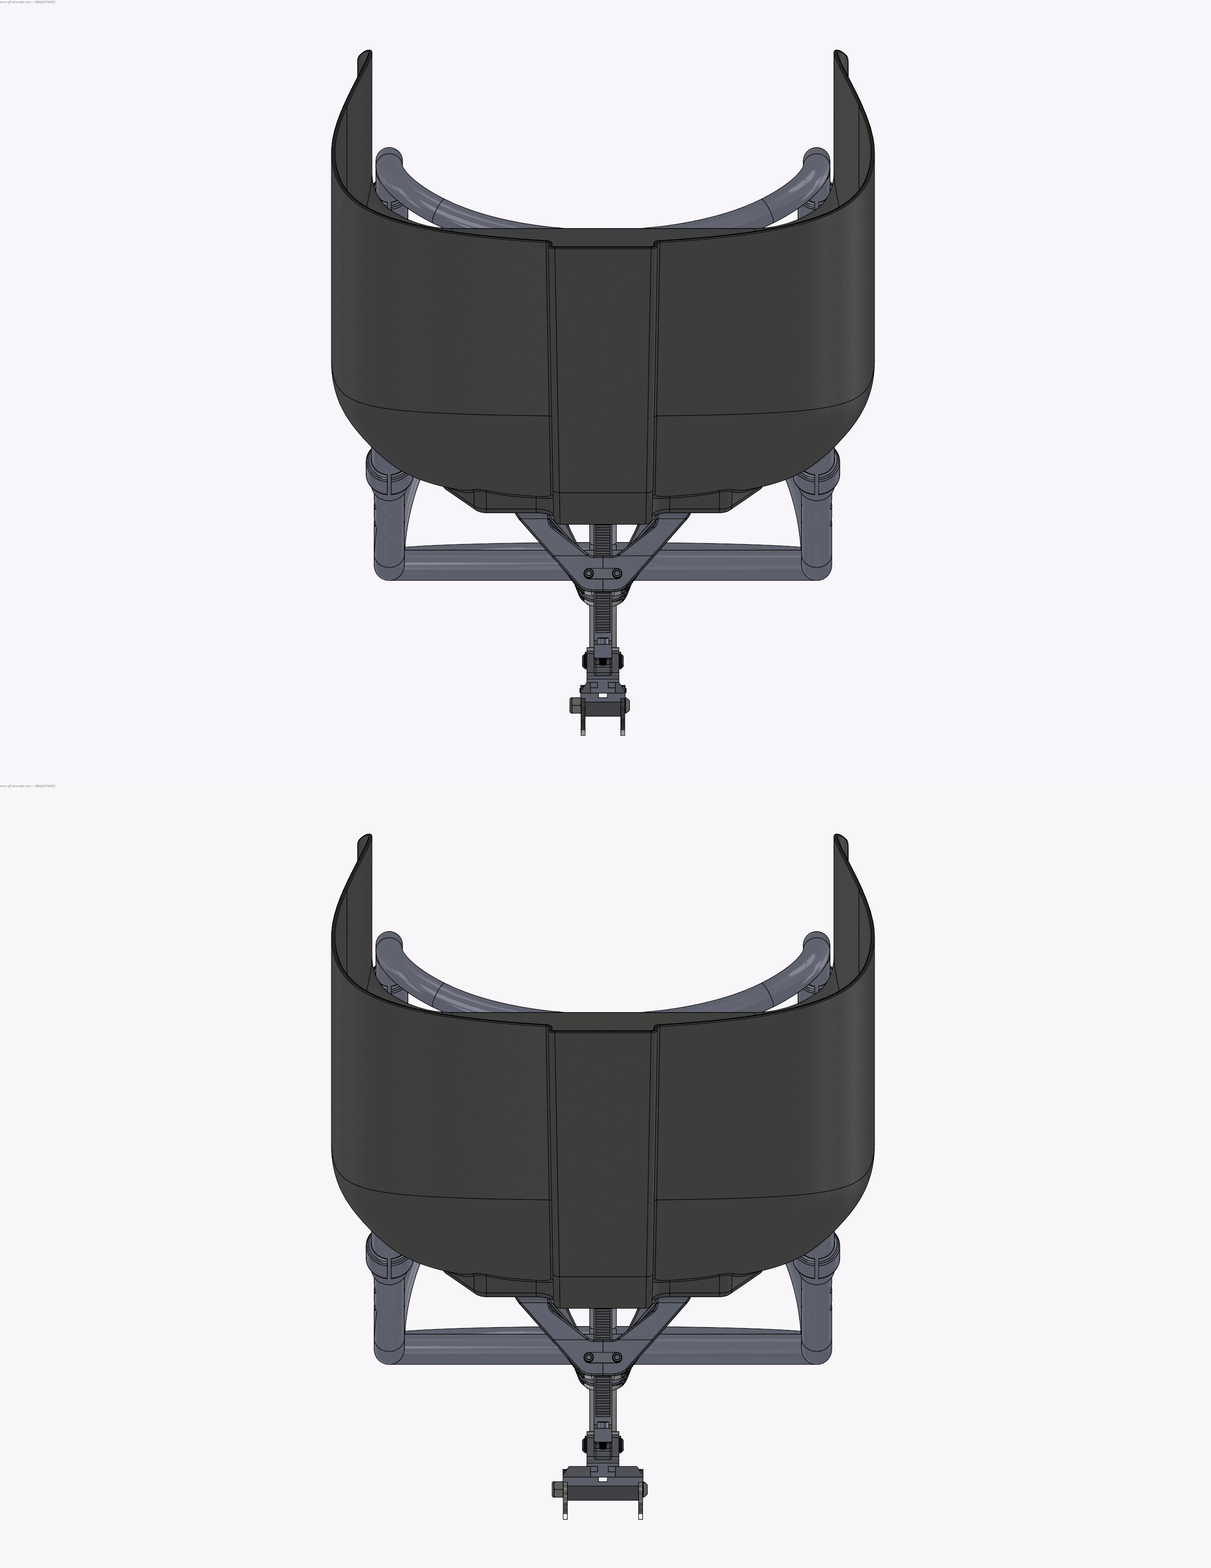
Blade Width Adjustment
The quick switch blade adjustment allows the player to quickly switch out different width blades to facilitate faster improvement.
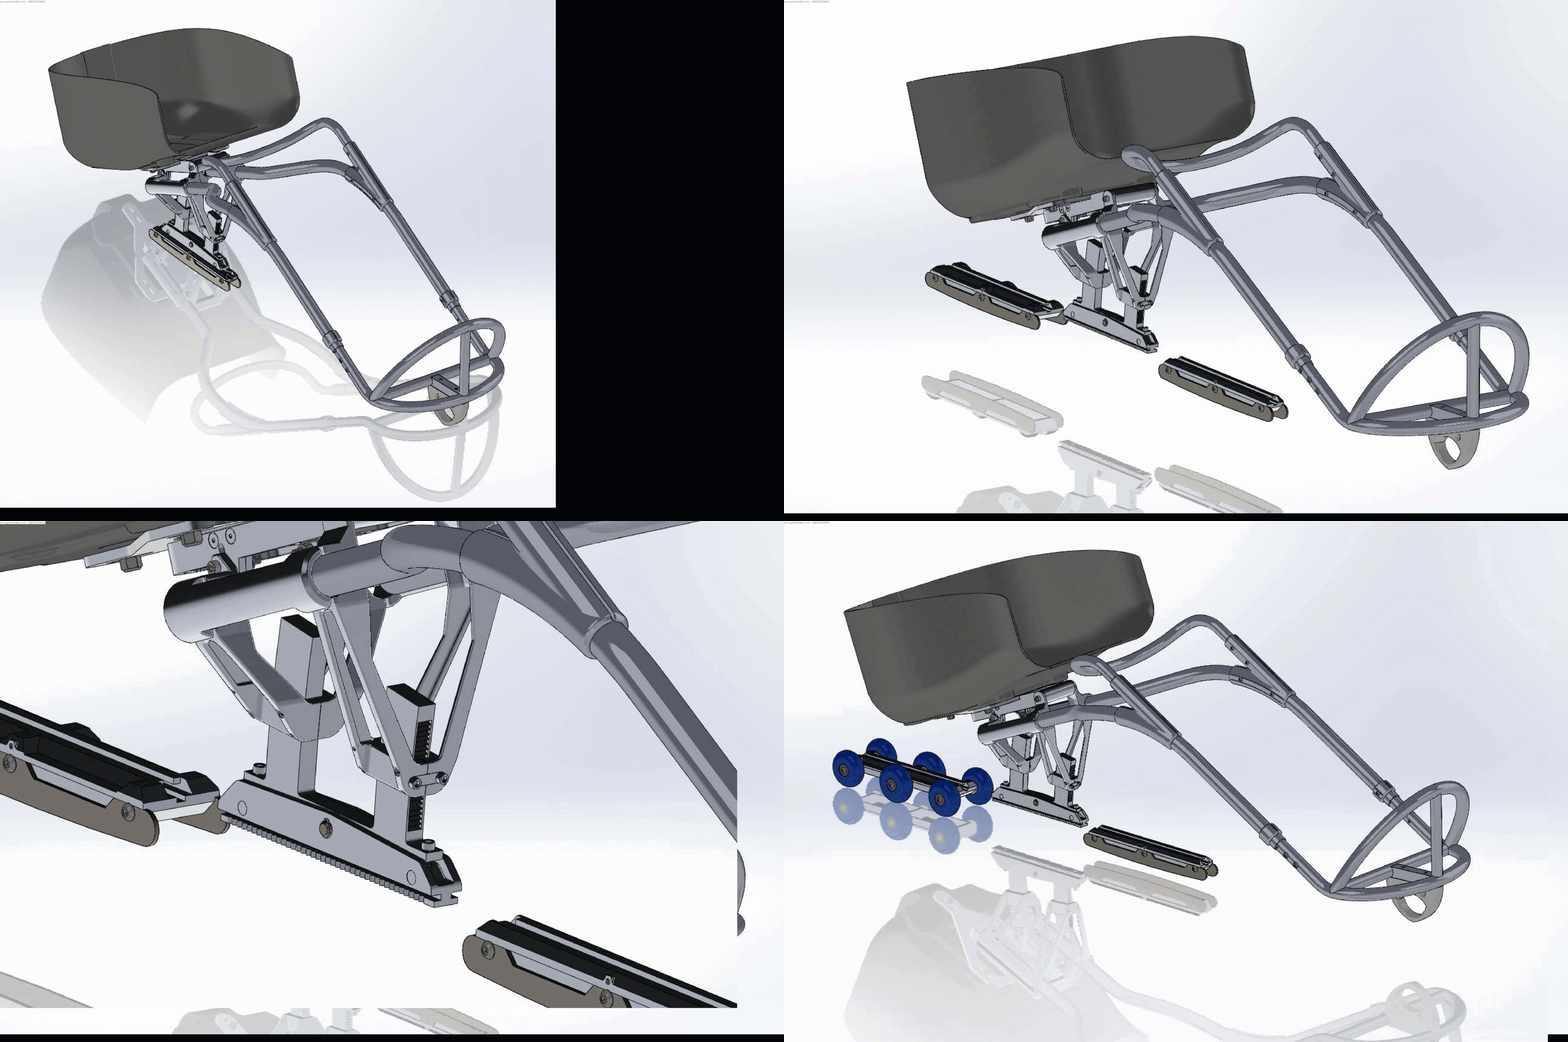
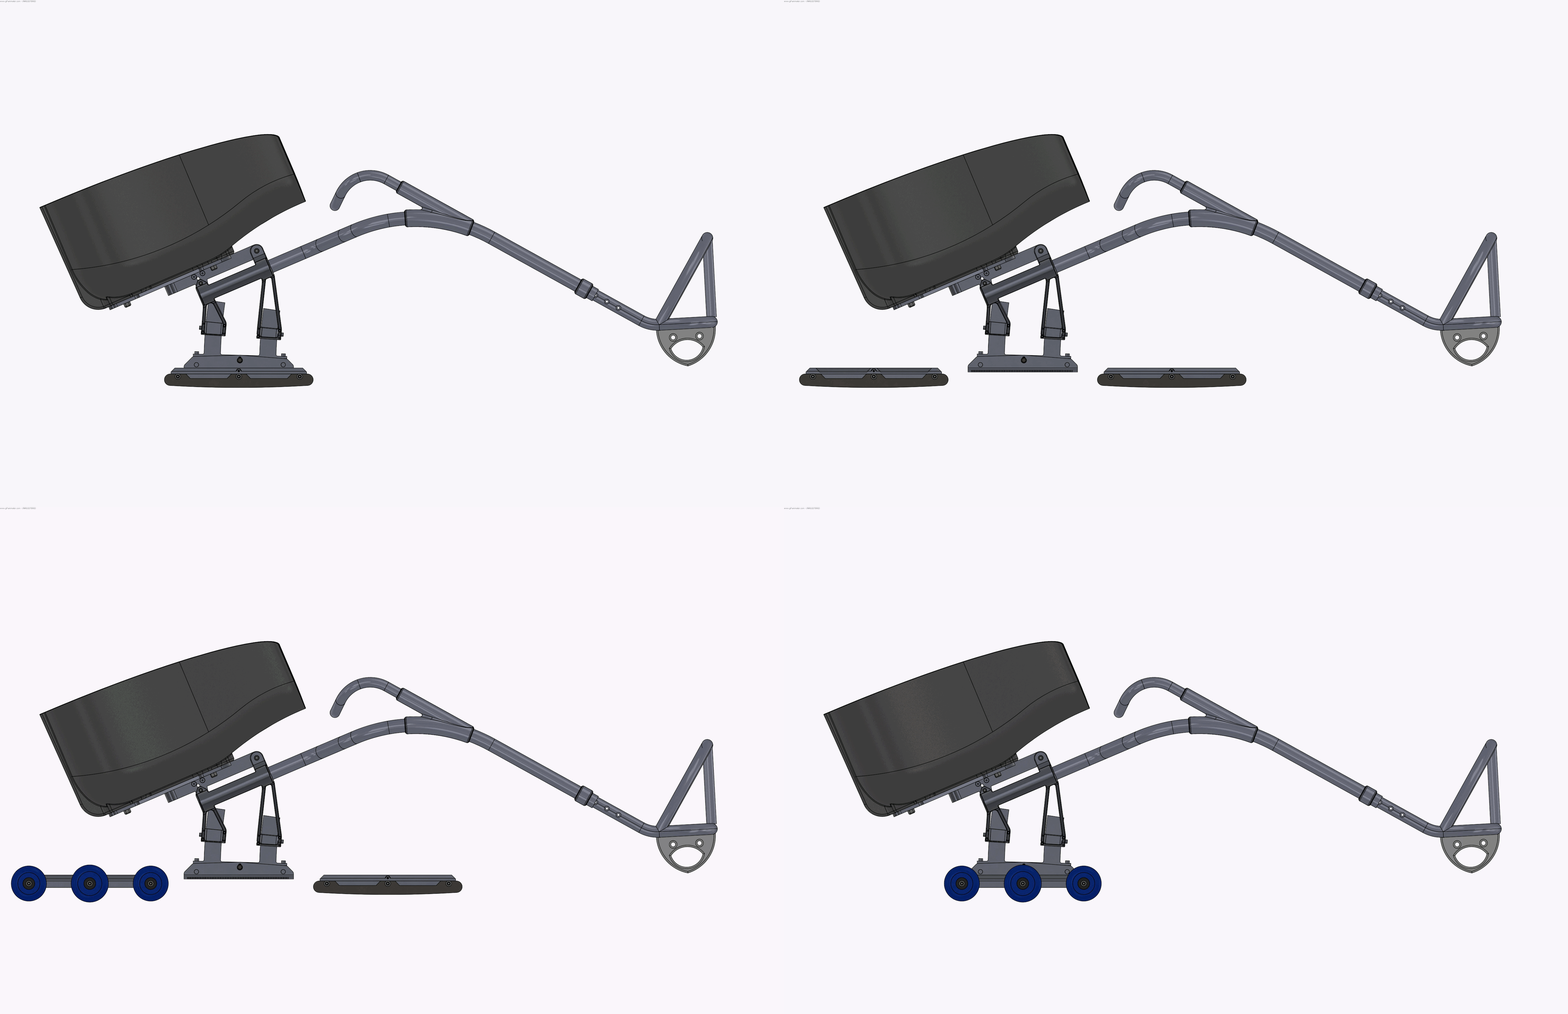
Blade Swap
The blades can also be easily swapped for wheels to help facilitate practice off the ice.
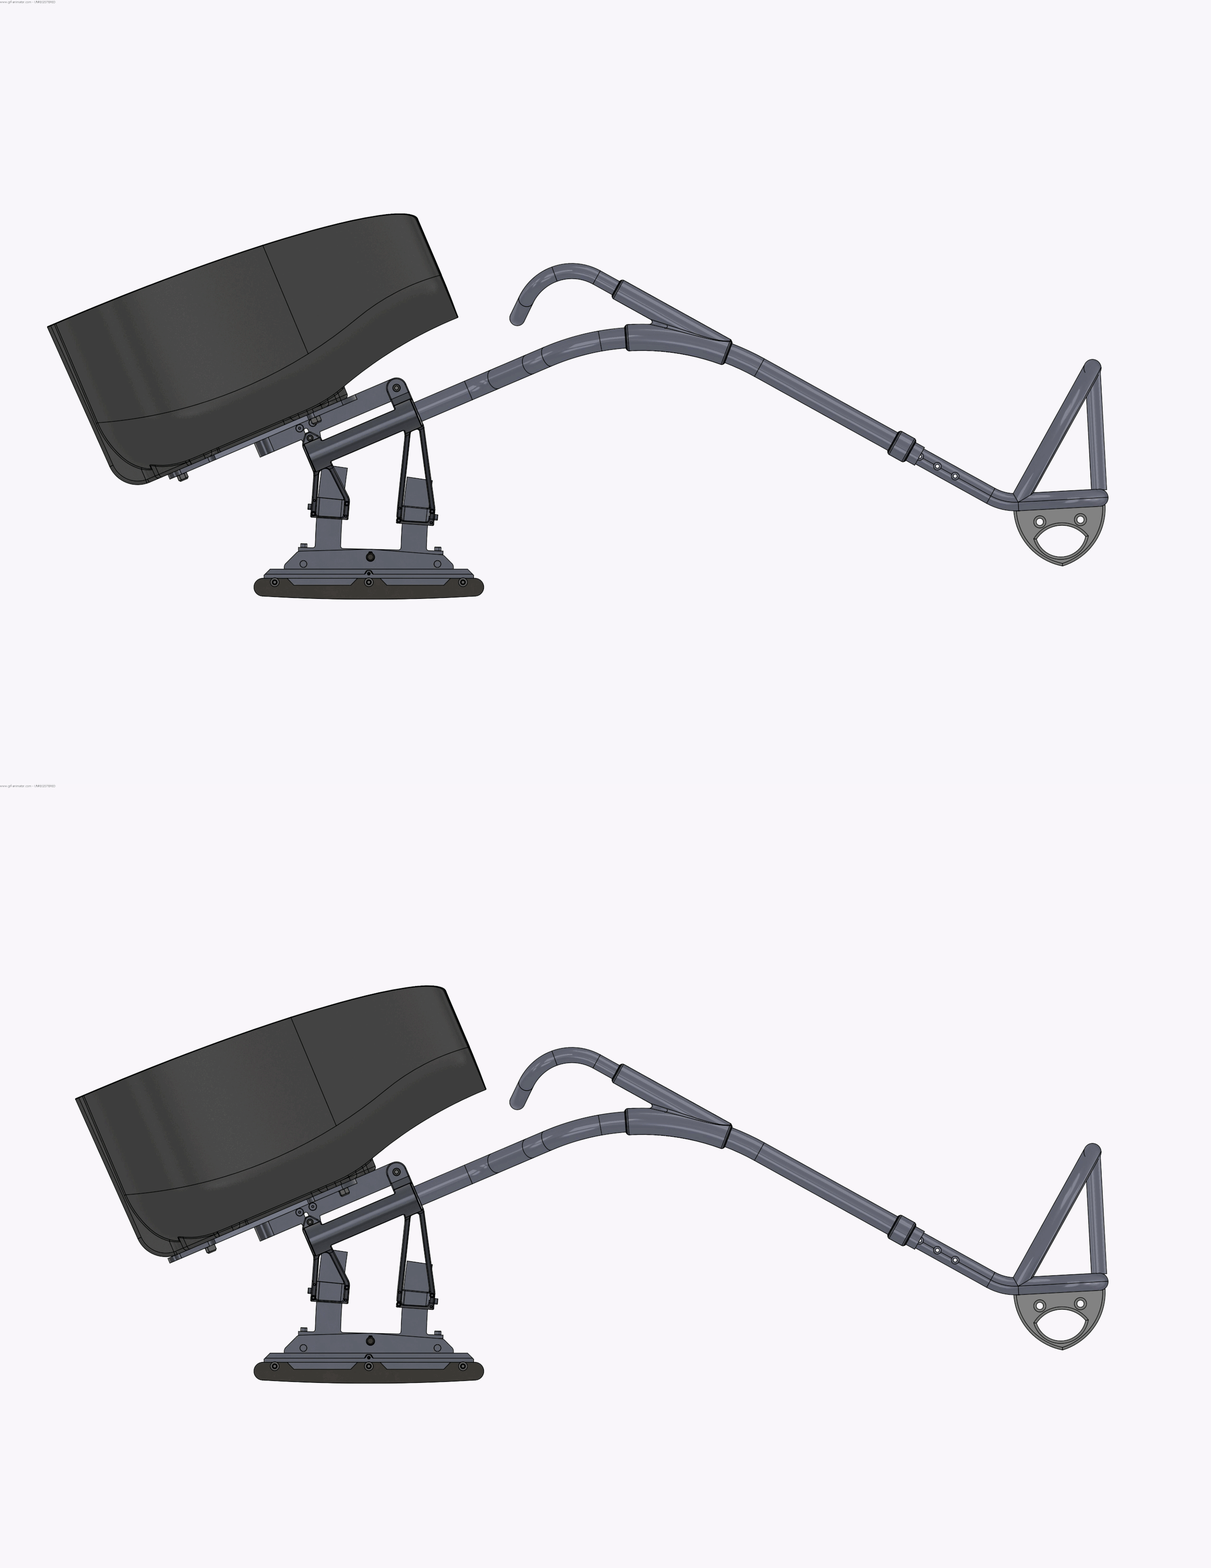
Bucket Position Adjustment
The Bucket can move forward and backwards 3 inches to help position the players knees at the bend in the tubes to ensure a comfortable sled.
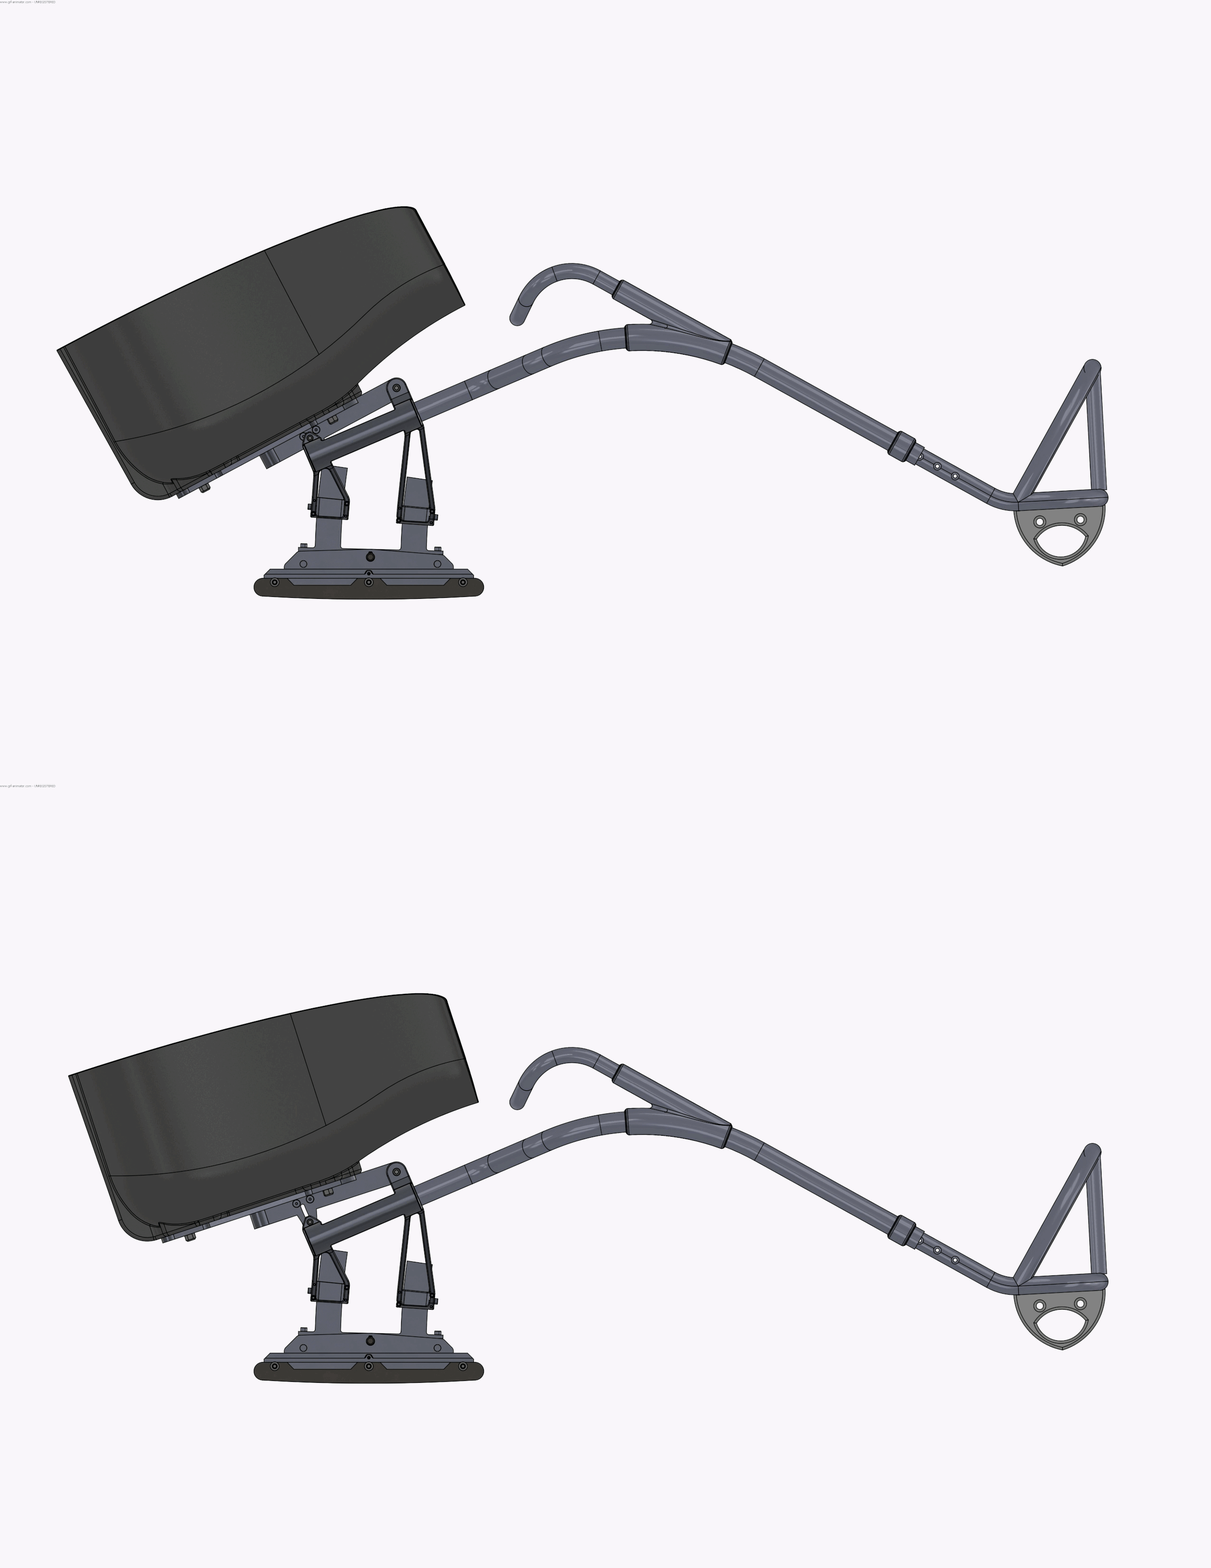
Bucket Tilt Adjustment
The Bucket can tilt up and down 5 degrees to fine tune the players ability to get in a more agile position.
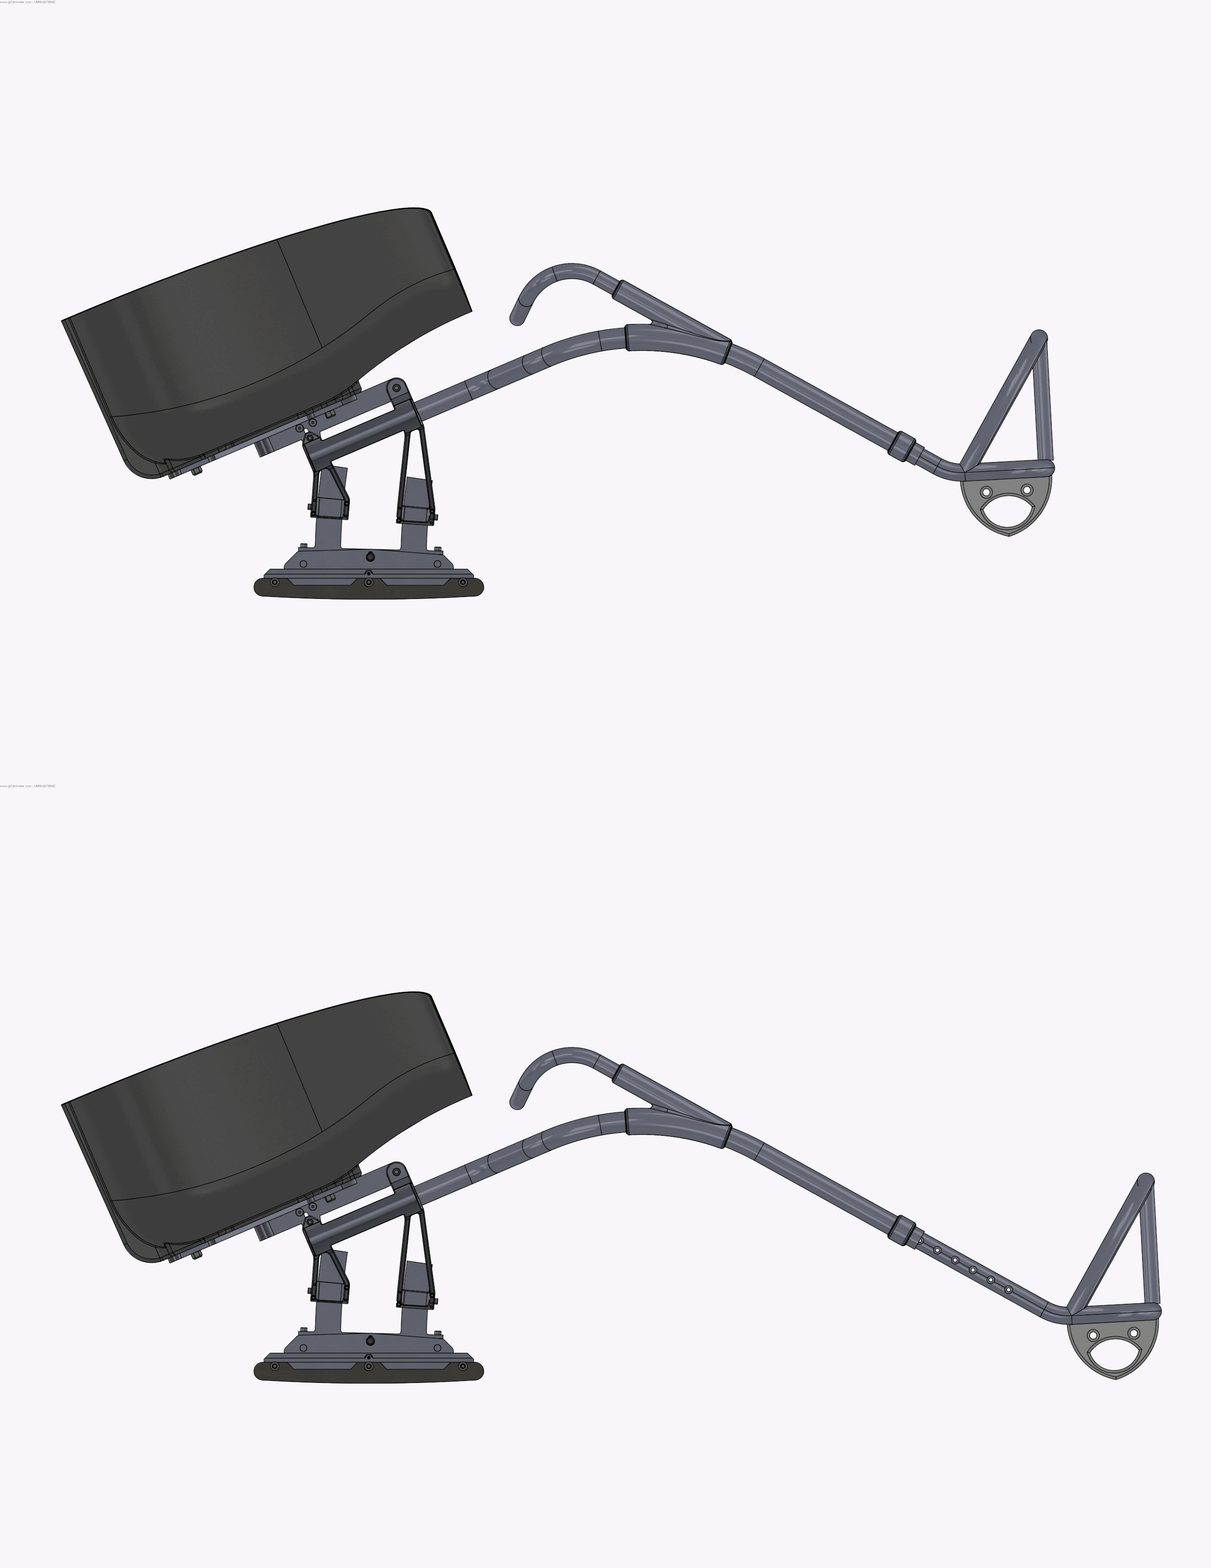
Front Tube Adjustment
The front nose tube can telescope out 5 inches to accommodate players of all sizes. It also allows the sled to grow with a young player through their career.
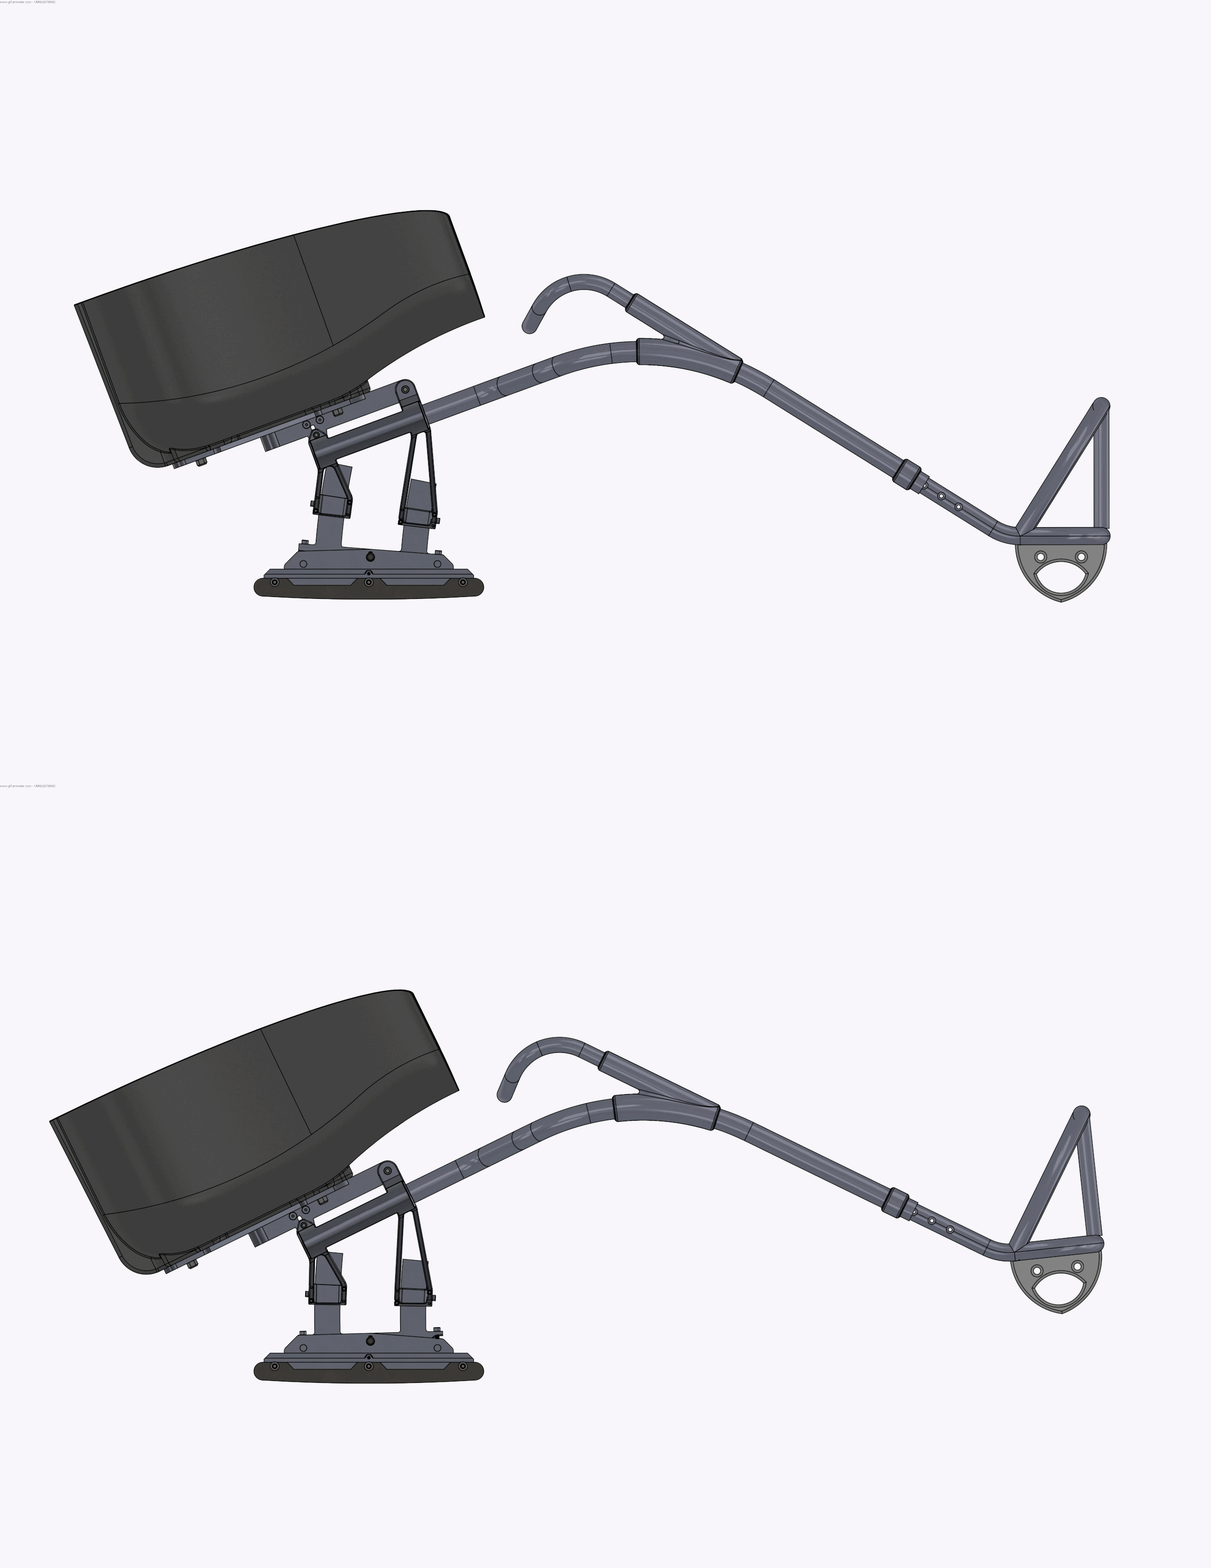
Blade Tilt Adjustment
The blades tilt the whole sled up 5 degrees to allow the player to fine tune the distance their skeg is off the ice.
